Hello and Welcome!


Welcome to my little place in the blogging world. :)
I like to share details here for the DT projects I create and also some of my own tutorials.
I would love you to leave me a comment so I know that you have visited me.
Thanks for stopping by! Ni :) x

Sunday 9 December 2012

Im having crafty stash withdrawal symptoms!

Happy Sunday bloggers and another big welcome to my recent new followers! :)
I know my posting has been a bit sporadic again recently but I do have a good reason for this which I know a lot of you will understand, sometimes 'real life' gets in the way of crafting time and this is one of those times, and don't even talk to me about finishing the Christmas shopping yet!!!

A few of you may know I was recently promoted at work and so with this new job role has come a lot of paperwork training, then travelling to another store an hours drive away and working as a staff supervisor. Helping to set up 2 new stores, one of which I have just transferred to in the last week, and then helping to organise, promote and run the new store which has mean an extra 10+ hours a week away from home and my beloved stash, also we have no Internet yet so I can't even blog on my lunch break! :(
Phew even writing about it all is tiring me out, so anyway you can see why I have not been able to make it into the craftroom much as I have been shattered in the evenings! When I have been in there I am trying to get ahead on my DT work and have decided my New Years resolution is to be more advanced with my DT prep if possible and get blog posts scheduled so I have a good quantity of posts to share on a regular basis, I am also working on new tutorials to share at my 2013 Docrafts demos. ;)

(Side note - More dates added, this time for Capture The Magic, Soham, Cambs.)  >>>>>>

Ok so my share today is a bit of a tease really.....


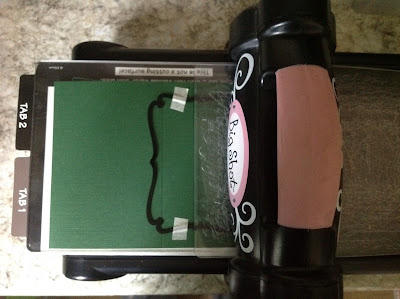
I have taken a close up shot of a small portion of my most recent Funky Hand DT project which has gone live on the Get Funky and Craft blog today.
If you look at the sentiment you can guess this is a Christmas card and the trees help give that away too but it's the fabby bright colours which I love that drew me to this download collection, after 5 months of Christmas crafting already this year I really liked this complete departure from any traditionally used Christmas colours. I'd love it if you would like to pop over to the blog and take a look at the whole card. Thanks for stopping by today, Ni. X

Friday 30 November 2012

Funky Hand & Tiddly Inks - It's Blog Hop time!

Hello! (and if you are a new visitor; then welcome, to my little paper crafting place). I'm Ni (Naomi) and a DT member for the wonderful Funky Hand.
If you are here today as a part of the combined Funky Hand and Tiddly Inks blog hop then you should have arrived here via Larrisa's blog.

Ok so without further waffling from me here is my hop card.....


I have used the super cute Cookie Bugg and extras digi stamp set from Tiddly Inks which comes with 2 sentiments, 2 bonus images and a backing paper.
To compliment the colours in the cookie I used the fabby Funky Kraft Stash backing paper download which has 3 different styles in 5 colour ways making a total of 15 papers, a great variety and so useful!

I coloured the images with promarkers, added glitter glue to the wings and used the cookie digi from the extras sheet as an embellishment.
The lighter kraft backing paper has a circle pattern on it whilst the darker one has a mottled texture effect, I don't know if you can see the detail properly in the photo though. I hope so as this is a super paper download!
I used Kraft card strips to cover the joins in the papers and for my layering. Then I made a small slit in the spine of the card and tied the sentiment panel around the whole front half and knotted it to finish off.

*****

Now when I was browsing the Tiddly Inks store another character caught my eye, and as it is December tomorrow I thought I would also share my 'Snowman Sid' creation with you. :)


Sid was also coloured using promarkers and given a sparkle with glitter glue. This card uses 2 papers from the Presents Wrapped download, the Xcut doorplate nesting die and one of the new border dies.

I hope you have enjoyed my projects today, you should now be hopping to Leah's blog or you can head to the Tiddly Inks blog to view the complete blog hop list.
Don't forget there are prizes of a $20 download voucher on offer from Christie for Tiddly Inks and also a £20 download voucher on offer from Anice for the Funky Hand site that you could be in with a chance of winning! Thanks for stopping by, I hope you enjoy all the wonderful inspiration from both DT's as you hop around. Ni. x

Thursday 22 November 2012

New Demos, Border Dies & a Blog Hop!

Welcome to today's information posting! As the title shows the information is in 3 parts and so I shall begin.....

1. Bookings for Docrafts Card Making Demonstrations for 2013 are starting to come in, very exciting, I cant wait to start sample making again and catch up with the lovely fellow crafters that I met last year as well as seeing lots of new faces. :D
Keep an eye on the sidebar for updates in the coming weeks >>>>>

*****

2. I have uploaded these examples of the newest Xcut Border Die sets to my Docrafts gallery today but thought here on the blog would be a good place of reference for the future too.

Set 1.                                                   Set 2.
 

*****

3. As you may have seen there are changes being made to the Funky Hand DT blog and exciting things happening in the company which I can't share with you just yet BUT I do have some great news which I shall share via the picture below!


The Funkettes are all busy crafting away on our blog hop creations for the Funky Inks blog hop next Friday as I'm sure everyone over at Tiddly Inks are too. Be sure to stop by any time after 6am (GMT) to view my post and find out how you can join in and see all the other fabulous projects! :)

Wednesday 14 November 2012

Quick Thank You Notes

Evening bloggers. :)
Tonight I am doing a quick share of some thank you cards that I have made to send to family/friends for my birthday gifts.


These simple little notelets are 4" square and made in a pearlescent cream cardstock.
First i stamped the Craftwork cards sentiment in black stazon and then used the Swiss dots embossing  folder all over the front of the card.
The flowers are all Papermania big bloomers from various ranges and the centres are an xcut snowflake punch which handily doubles as flower stamen! I used card candy in the middles of the punched shapes in coordinating colours. Perfect, cute but simple and easily replicated.

Thanks for stopping by today and once again don't forget my blog candy to win a 6 month membership to the Docrafts Creativity Club, tell your friends! :)

Friday 9 November 2012

Stampin' Up! - Christmas Class

I recently went to my first Stampin' Up! Class which was run by my demonstrator friend. I love the way the SU products are all from the same colour palette so everything matches and how they coordinate their punches & die sets to match with their stamps, fabulous! :)


In the class we made 4 card designs, 2 of each, all using the Ornament Keepsakes stamps and matching framelits dies.

The card to the right uses the 'Greetings of the Season' Noel sentiment, a snowflake embossing folder and the branches are made by using part of an image from the Lovely as a Tree set. The holders on the baubles were created using Glass Stampin' Glitter in Champage.


This card uses Bakers Twine and Dazzling Diamonds. The sentiment is from the More Merry Messages set.


This card uses the textured impressions embossing folder, Holiday Frame, embossed onto white card and die cut with the Apothecary Accents Framelits.
The bauble was given a glittery sheen using the Shimmer Paint.

This last card has a small fault and highlights the dangers of red liner tape! I was trying to line up the white panel onto the base card and it touched in the corners and was stuck, I will trim the extra card from the side before it is sent.

This sentiment is from the Chock-Full of Cheer set. The paper piercing shape was created using the Festive template set but the shape was slightly changed to fit onto the A6 size card.


I am really pleased with these cards, I love the designs and can't wait to go to my next class. It was really nice to be taught different techniques and I have placed my first order if an SU product which I will share once it arrives and I have created a project using it.
Have a good weekend everyone.

Saturday 3 November 2012

Creativity Club DT share - Patterns to Love.

Evening all, thank goodness it is the weekend, we've had a completely utterly manic week at work and I am truly shattered! I have had a relaxing afternoon with a little crafting and just watched Strictly!

More importantly, today's share is a card that I have made using the newest Docrafts, Creativity Club Downloads, Patterns to Love - parts 1 & 2. This is a super download using pale blue, turquoise and white in a variety of patterns all with a distressed, shabby feeling to them, they're gorgeous!


I used 2 papers from the downloads, one with the smaller pattern on and one with the larger pattern on and in a different colour way to add contrast. Can you see the distressed edge on the paper at the top, this is great for if you need a quick card or for people who are not confident at the technique.

When thinking for a focal point for this card the colour just said to me 'Tatty Ted's blue nose', so I rummaged in my stash and found this decoupage. The mount is the Xcut Doorplate die, the ribbon is from Wilkinsons new Christmas wrapping section, the sentiment is a Me to You one stuck onto one of the Xcut Tags and Bookplates die cuts and the stars were from a mini stamp set.

I have also used an exciting (well it is to me as a die cutting addict!) new product on this card too. The Xcut Border Dies, Set 1, for the double scalloped edging effect. These are 12" strips and come in packs of three and there are 3 sets. I cut the edge off the backing paper with the die first to give me a border strip (for use on another project) and this of course left the paper with the decorative edge too. I then cut the same strip from turquoise card and stuck them onto the base card against each other, simple!


DON'T FORGET! - My blog candy to win a 6 month membership to the Docrafts Creativtiy Club is still running, only another 20 or so followers to go. Again a big welcome to all my new followers, thank you for joining me and I hope you are liking what you see here. Ni. X

Thursday 25 October 2012

Funky Hand DT card & Docrafts Daily Sketch

Good afternoon bloggers and a special welcome to my new followers, its great to have you here!

I am just stopping by today to share with you my latest DT creation for the Funky Hand challenge blog, Get Funky!
The theme this month is to make a kids Christams card and I just love the new Oh Come All Ye Crafters digi stamp download with this cute little santa in it. There are also 3 other images, you can see them and buy it here. The star backing paper is the funky freebie for this month that Anice provided, so that even if you dont own anything from Funky Hand yet then you can still take part in the challenge and be in with the chance to win a free download! :)


Here is the card blurb:
The Santa image was coloured in using promarkers, the present is an old Quickutz die and the ribbon and sentiment are from my HUGE Xmas craft stash! The green backing paper is from the Make A List download, part of the series of 8 in the new Oh Come All Ye Crafters range.

I have not added any extra embellishments to the card yet as I thought with so many patterns and layers on there already it could become a bit cluttered. I might walk away and leave it for a few days then come back to it and see what I think, sometimes it is just best not to over think it and know when to walk away! ;)

***

The layout for this card was inspired by today's free sketch download in the Docrafts Creativity Club, sorry but I wont be sharing the actual sketch here as then it wouldnt be very exclusive, would it! ;)
I loved all the layers of this sketch and as I am not good at designing a card with some many elements myself it was great to have this helping hand to start me off. The only thing is that then there was no stopping me so I added the ribbon strip and sentiment circle! To download the exclusive club members sketch pop here but be quick as there will be a new sketch uploaded tomorrow!
I hope you like todays card, dont forget my blog candy is still on and continuing until I reach 100 followers, the prize is a 6 month membership to the Docrafts Creativity Club, what a nice early christmas present that would make! Bye for now, Ni. x


Wednesday 10 October 2012

Creativity Club DT share - Home for Christmas.

Morning bloggers, it's Wednesday so that means I am back with a new DT card for the Docrafts, Creativity Club.

This week my card uses one of the recent downloads, You & Me, which comes in 4 parts and the paper I have used for this project was in part 1.
The You & Me collection is really pretty in soft pastels with floral and bird images but I want to remind you to look at the pages individually and that you can use them in different ways and so my card today is Christmas related!


The green backing paper is the one from the Me & You download, not a flower or bird in sight so perfect for matching with other images but don't think of it as just 'plain' as there is a line/dot pattern on the paper.

The other backing paper is from the recently released Home for Christmas range as is the die cut shape and the matching patterned stamp. The sentiment is one that I cut (gasp!) out of one of the Christmas Tidings urban 4" square stamps as I really liked the fonts on it. The baubles are from the same range and have been stamped on to white card and cut out, strips of acetate have been attached to the back of the green paper and the baubles stuck to the other end so that they actually hang on the front of the card. I have covered the acetate strip with silver border peel offs.

I hope you like this card and if you are a club member already then I hope it makes you look at the huge collection of downloads in a different way! If you are not a member then don't forget that I am running my blog candy with a 6 month Creativity Club membership as the prize!

Thanks for stopping by today. I am off to a distress inks workshop as a student instead of demonstrating for a change, can't wait to learn some new skills and get inky, fun! :D

Wednesday 3 October 2012

Creativity Club DT share - Tulip Christmas

Afternoon all, a very much later than planned post from me today but I had a friend come round to start planning a London birthday trip - sight seeing, shopping and a show, whoopee!!


Anyway..... todays card uses the new Tulip Christmas collection and is an image from one of the A4 decoupage packs (4 sheets of decoupage and 4 sheets of papers for £3, great value!) which make 8 decoupage images per pack and contain duo papers, two patterns with a border strip accross the middle to cut up as you wish.

Now my card doesnt use paper from the pack but rather a fab stripey one from the Love Christmas, Creativity Club download andmy  layout inspiration came from todays daily sketch no.94.


The flower embellishment was made using the gorgeous new Home For Christmas paper & Bloom, xcut nesting dies and was inspired by the tutorial from Jo Austin on Creativtiy TV recently. Thanks Jo! :)
Aslo used, xcut scallop broder punch, red shimmer dome stickers and Anitas sentiment ribbon.

*** I hope you like this card, dont forget to leave a comment on the original post at the top of the page, and also here to have two chances to win my fab Creativity Club 6 month menbership blog candy. Ni. x ***

Sunday 23 September 2012

Easy Swing Card - Photo Tutorial

Good morning everyone, well finally I have made it back here to post my tutorial for the style of Swing Card (aka. Flip Card) that I shared in my previous post.

After showing this technique to a large number of crafters at my Docrafts demonstrations over recent months it was decided that my traditional style of demo freebie written tutorial sheets would be much too complicated for this technique and so a photo tutorial with notes has been created.
Bare with me, I hope it makes sense, please let me know if you think any changes need to be made and I'll update as requested. :)


Remember, I have used my parenthesis rectangle no.2 dies from xcut but you can use any symmetrical shape that has an easily identifiable centre (I will do a quick post this week showing how to easily use a circle too!). These measurements make a 5 1/4" card.

Ok so without further ado here is the tutorial in 10 very easy steps.....
*******
1. -  First take a sheet of card that measures 7 1/4" by 5 1/4".
2. - Work with the card horizontally and score at 2 3/4" and 3 3/4"

*******
3. - Next take you chosen die and place it on top of the card, lining up the centre of the die with the
2 3/4" score line.
4. - Tape the die into place with low tack tape (stick onto clothes if necessary to de-sticky it a little so it will not rip your card when removed). Place the tape over the small middle panel as shown below, this is a good visual reminder of where not to cut or you will ruin the swing mechanism!


*******
5. - Place the card on the base plate of your chosen die cutting machine and feed the top plate through and line it up with the 3 3/4" score line as shown below. Remember, don't cover the tape! Roll through your machine.
By making your sandwich is this staggered way, when you roll it through your machine you will only cut where the sandwich is complete, so in this case the small area on the right side of the score line.


*******
6. - Once out of the machine, turn your card round 180 degrees and make up a new staggered sandwich to cut the other side of the die, as again shown in the photo below. Remember, don't cover the tape! Roll through your machine.
7. - Once cut, remove the die and lay the card horizonally as before.


*******
8. - Now fold the left side of your card over towards the right edge, creasing at the 3 3/4" score line.
9. - Then fold the same side back to your left creasing on the 2 3/4" score line to give you a finished card blank that will stand like this.....


*******
10. - Decorate as required!
Remember that because you used a die to cut the shaped swing panel you can use the same die for a perfect decorative layer as on the front of my card using the tartan paper, AND you can use the smaller shapes with plain card to create a space to write your message to the recipient.


*******

Right, phew! That's it, tutorial done! Now over to you to see what you think of it!
Thanks for stoping by today, I hope it has been a useful visit and I welcome any comments. Ni. :) x

Monday 10 September 2012

Boofle Christmas and the tutorial is on its way, promise!

Well here we are again, the beginning of a new alternate month means a new set of Docrafts products being released and the mad week or so that is demo prep time!

This loop is completely Christmas based, sure to get everyone into the Christmas crafting mood!
We have new ranges from Tulip (gorgeous!), Michael Powell (superb!) and the stunning red & white
Home for Christmas with twine, tags, and Nordic inspired designs (I'll upload a few samples over the next couple of weeks). Oh and we must not forget Docrafts newest hot selling character, the knitted cardigan dog that is Boofle!

Now love him or loathe him, bare with me, I have been promising quite a few of the lovely ladies that I have met at my demos recently that I would do you a photo tutorial of the Swing Cards I have been making and I have finally done it and decorated my newest sample using the Boofle collection. :)

Here is the card closed,

and here it is opened up to show the reverse of the swing panel.

I took the photos whilst making my sample so they are all ready to upload, I just need to work out how to write it up clearly now too!
I am away for a few days this week so hopefully it will get finished ready for Friday eve so that when I do my demonstration at the Range, Norwich on Saturday it will already be live, here's hoping!

Right off to the pub for a meal now I think, thanks for stopping by, I hope you will pop back for the tutorial soon. :) Ni. x

Tuesday 28 August 2012

Docrafts A-Z Challenge, letter T.

Evening everyone, I am sharing a quick card today that I have made for a family member and its the dreaded male card!
Luckily most of my family are catered for now using the super Wellington range from Docrafts as it shows Wellington the bear with many sports and leisure activities, perfect.

This card is for the Docrafts A-Z challenge which is over on their blog. The letter this time is T and the products to be used are tags and twine.

I have used some brown/white twine from my stash and my tag is one of the decorative stamps from the new Docrafts, Home for Christmas range in the Tags set.
The stamp comes with 3 lines in the centre for you to hand write a message or leave blank as an embellishment but I have horrified ladies at my recent demos by cutting my stamps up and so I have removed those lines from my stamp with a craft knife and used a Just Rite sentiment stamp to fill the gap, luckily it's a really good fit! :)
Right, I'm off to do some stamping ready for demo prep with new Docrafts products next weekend! Ni. X


Thursday 9 August 2012

Guess The Crafty Item - Revealed!

Hiya crafters!
Well there were a few very clever guesses yesterday evening as to what my new exciting crafty item is and here is the answer:

A Promarker Storage Unit!!! :D :D :D Yay!

*** A big well done to the winner chosen at random, ChrisAndCat!!! ***

Please PM me over on Docrafts with your address and I'll get your prize sent before the weekend.
Thanks to everyone who played along. :)


So, I had been saying I wanted a storage unit for my pens as I was getting annoyed with having them in plastic boxes and having to search around for colours. Well after a month or so of dropping hints we set to designing a very basic unit.
What you can't really see from the photo is that the box is 4" deep with a solid back and two lattice effect panels to hold the pens securely. This means it can be turned horizontally for transport to my boyfriends when I craft there over the weekend or if I go to crafty play days at a friends. Clever touch! ;)
Dad drilled all the holes, 180 of them! (for the basic collection, all Seasonal Limited Editions and a few extra just in case!) so we marked the grid out with a pencil as a guide, mounted them on the deep frame and it was pained white.
I am loving how easy it is to find my pens now! :D
No one except crafters would understand how exciting this is, so I hope you've enjoyed my little share. Ni. X

Wednesday 8 August 2012

A quick competition! Guess the crafty item.....

Good afternoon crafters!
I am so excited about a new crafty item that I have just received, and I will share it in its entirety tomorrow...
but I thought it might be fun to have a 'guess the item' competition with a chance to win a little prize of :
a new pack of Strictly Party, Glitter Sentiments and 3 sets of Anita's Christmas Decorative Toppers!

Ok, so here is the picture below..... it's quite easy really isn't it?! ;)

Leave a comment here with your guess and Docrafts forum name (if applicable) and I will take all the correct guesses and pull one out of a hat tomorrow (Thursday) morning and announce it here on the blog along with the full post about my mystery item!
Good Luck! :D Ni. x

Sunday 29 July 2012

Get Funky! - Just A Number Challenge

Morning everyone, its that time of the month again, I am here to share my DT post for the Get Funky! challenge blog! :)

The theme this month is "Just a Number" and my project uses the Gift Wallet template from the newest release Wishes and Kisses cd.


I printed the template out onto a Funky Hand paper (look out for that in a later post!) and then used that template to draw outline of the gift wallet onto some green card. I rounded the corners and then using the Funky Freebie paper from Anice I have trimmed it down to cover the front and inner flap of my wallet.
I used a small message tag and brad from my stash for the front cover and some of the green base card to make a paper ribbon strip and to mount it on.
To make a space for writing a little message inside the wallet I have used the two larger sizes of the Labels 4 Spellbinders to cut the Freebie and some white card which I edged in green ink.

Quite a simple little share from me this time but I just think this is such a clever template and so versatile for sharing a variety of things like store gift cards, a voucher, money or even a lottery ticket!

Wednesday 25 July 2012

Easel Drawer Box Card - Tutorial

** WARNING! Photo heavy post!**

Well after another long break from blogging I am finally back to share my most recent demonstration tutorial for Easel Drawer Box Cards, or whatever you like to call them!
I had seen a few of these around last year and I made one at Christmas to hold 3" notelets but had not made a tutorial sheet for it, so my craft buddy Joanne and I set to work!

We have made 2 sizes of these projects with different suggested uses.
*The smaller one finishes up at 3" square and will stand up to look like a regular card when the drawer is closed. It is perfect for a small piece of jewellery or a few individually wrapped chocolates as a little gift.

This one was simply decorated using the Wellington range from Docrafts...


*The larger one finishes up at 3 1/2" square which as I mentioned before is perfect for 3" notelets like the ones below that I have decorated using the Lucy Cromwell collection from Docrafts...


And here are my versions using the Enchanted Fairies and Bexley Black ranges.


 ...and finally, here are the size guides. They really are very simple to put together but just remember to use a good weight of card to give it some stability.


Thanks for stopping by, hope I haven't bored you with so many photos! Ni. x


Sunday 17 June 2012

Wellington Fathers Day Card

Evening everyone,
Here is the card I made for my Dad this year, a fairly simple card using one of the new Wellington embossabilities stickers.

The fabby text backing paper is from the Wellington collection as are the sentiment tag and 'Dad' stamp.
Everything is mounted on a kraft card blank and the border punch is doily dots, all by Docrafts.

I hope this post publishes ok as I'm sending it via email on my blackberry, very clever if it works! :)
Have a nice evening, I'm off to find a little something for tea, maybe cheese and crackers, yum! :)

Sent using BlackBerry® from Orange

Monday 11 June 2012

My 1st Funky Hand DT card - finally!

Well what a crazy couple of weeks it has been here, a blown car exhaust and a broken speedometer on two seperate cars, and then a big printer malfunction, all before a 3 day conference in Bournemouth with Docrafts - more about that soon!
Then there was a day visit to a close crafty friend of mine on the saturday and a Jubilee BBQ on bank holiday monday, all before work again on Tuesday! Phew, makes me feel tired again just typing about it! ;)
Now I'm back (or as close as I get!) to normal and so am back to my prep work and blogging about it too!

The card below is my first DT sample for the new "Wishes & Kisses" cd from Funky Hand which was released whilst I was away. These Papercraft Factory cds come complete with a workspace which allows you to do clever things with your backing papers and it also has new templates, as well as the much requested lower case letters in the Wordbook generator! Yay, thanks Anice! :)

There are 12 all new paper designs/colour collections on the cd and all the Funkettes are working with a specific collection for their first few projects; so my first card uses papers from the 'Hey Baby Girl' collection.
I've also used the pram and a sentiment digi stamps and the flower embellishment was made using one of the new templates fixed together with a flower brad.
I am loving these new templates, there is also a gift card wallet and an exploding box which I have made and will be blogging about very soon.

Right, now I'm off to finish a wordbook (using lower case letters of course!) ready for Father's Day coming up. Thanks for stopping by, Ni. :) x

Tuesday 22 May 2012

Exciting News!!!!! :)

Good afternoon, I know I said I would upload the Easel Box Card instructions but it's been a busy few weeks, I promise, promise, promise it will be done soon! :)

However today I have some fab personal news to share, here's a pictoral clue:


Yes that's right, I have been accepted on to the Funky Hand Design Gang - I am now a member of the 'Funkettes' lol!


Myself, Debbie, Belinda and Sammylou are all new DT members, you can pop over to Anice's blog to see the official announcement post and find links to the blogs of my new fellow funkettes!

I am so thrilled to be on the DT and have been bouncing around the house for days wanting to share my wonderful news with other crafty minded people, as my family/friends don't really understand what all the excitment is about! I will hopefully be back very soon with my first DT projects to share.

Here, in case you are interested, are a couple of the cards I sent as samples with my application as well as the contents of my blog and Docrafts galleries lol!

This is a card combining different patterns of tonal papers, die cut shapes and two Wellington stamps,


and this card is more CAS and uses the Bexley Black collection and a Lucy cromwell sentiment stamp.


Thanks for stopping by! :) Ni. x

Thursday 3 May 2012

New Docrafts samples!

Good (very wet and cold!) afternoon.
As I said in my last post, my new Docrafts kit had just arrived and so this week has been prep crazy here in my craftroom with the new product demonstrations starting this weekend. :)

This loop sees the release of the Wellington the bear range, he is adorable but much more of a manly bear with distressed styled papers, one in a sport theme, a timepieces one and some of just text in lovely masculine colours.
Also new are the lovely capsule collections in Lincoln Linen and Bexley Black, following on from the same patterns as the pink and blue collections launched in January. The black/white collection makes such striking elegant cards and the linen is perfect for the wedding scrapbook I'm working on; loving them both!
Last but definitely not least is the GORGEOUS Lucy Cromwell collection! The same designer that gave us Henbury Lane has produced a new collection with lovely soft tones, pretty dresses, cakes, presents, florals and gardening images. A really wide variety and there is sure to be something here you will love.

The card below uses blue spotty Designstax card, pretty cupcake/butterfly backing paper, a glitter die cut topper and a sentiment all from the LC collection.


After seeing the fairy easel card box that I posted here from my last range of samples, uploaded on my docrafts gallery and took to my demos I have been asked by some customers (and a store!) to make another one for this loop of products and provide my set of instructions for making it.
Well they're in for a treat, not only have I made Wellington and Bexley Black versions but this is the LC one with a secret suprise in the drawer! I'll upload the instructions in another post along with the reveal of what's inside! :)


Right thats enough of a 'break' from my prep, back to the desk now! :) x

Saturday 28 April 2012

Get Funky! Challenge - Let's Get Sentimental!

Good afternoon!
I just wanted to stop by and post my card for the latest Get Funky! challenge which this month has the theme of Let's Get Sentimental.


I have opted for a really simple layout this month in order to make the sentiment the focal point of my card as the theme suggests. :)

I've used some more papers from the newly released Spring Has Sprung download, I think the daisy design is my favourite right now but ask me again in a few days and I'll have probably changed my mind to one of the other lovely designs!

I cut the papers out using the xcut nesting die - postage stamp, mounted them on to green card and used a black fine liner pen to draw around the edge of the shape to highlight it. The sentiment was stamped onto the same card and then using a small circle punch I punched out one of the daisies to cover up the star in the stamped image and tie it in with the papers.

What you cant really tell from the photo is that the papers are printed onto a thin pearlescent paper which gives a lovely look and everything is mounted onto a pearlescent card blank.

Supplies:
Funky Hand - Spring Has Sprung download
xcut nesting dies - postage stamp
Papermania - 'Thank You' typography stamp/die duo

Thanks for stopping by! Im now off to find some paracetamol to try and get rid of my headache so I can pop into my craft room for a few hours. My new Docrafts kit arrived this week and I haven't felt well enough to play with it yet so its all systems go from tomorrow to get my usual 30+ samples made this week ready for my first demo on Saturday. I'll be back with some samples soon, promise! :)


Wednesday 18 April 2012

Pink Mousey Easel Card

Good afternoon! This is the last minute card that I have made this morning which will be posted as soon as the glue is dry! :)

I have used a new product to me, a Craftwork Cards, scalloped circle easel card base, can't believe I hadn't bought any of these before now, I love them!


The topper is from the Hot Diggity Dog range from Docrafts, as are the Parkstone Pink papers.
The sentiment is by Craftwork Cards and of course the 'frame' has been made using silver card candy.
The die cut letters are a quickutz alphabet, Pheobe.
I love this pretty card and hope my Auntie will too! Ni. :) x

Thursday 12 April 2012

Get funky! Challenge - Spring Celebrations.

Evening all! Here is my last minute entry into the Get Funky! challenge this month.
The theme is Spring Celebrations and so I've used the freebie download for this month and a paper from the new Spring Has Sprung download which I 'accidentally' bought in the sale over the weekend, oops! :) 


I've added my Boofle topper to the card using a strip of acetate attached with a brad to give an extra springy dimension to the card & glazed his eyes and buttons for a shiny glossy finish.
The sentiment is from the Boofle range too and Ive used card candy coloured with promarkers to add detail to the corners of the card.
Ni. X

Tuesday 10 April 2012

The end of the Loop!

Wow time has gone so quickly again that I have now completed all my demo's for the current loop of Docrafts products. Tomorrow will be spent unpacking my bags, having a final play with some of the items and then adding it all into my stash ready for the next kit to arrive in a few weeks. :)

Here are a few cards from the demo on Saturday that I wanted to share, which use the recently released Enchanted Fairies range of products:

This first card uses the tutorial from my previous post for the Box Pop-Up cards and some zingy green card with a fairy topper, papers and sentiment.

This is a mini 4" square stepper card using the die cut frames sheet from the Goody Bag as well as the papers and sentiments.

Lastly is the project which was the 'hit' of the day! This is a mini Easel Box Card which I have made specificaly to fit the mini notelets and envelopes from Papermania.

I used a lot more layers and embellishments on this project than is usual for me and I'm really pleased with how it came out. The store loved it so much that I let them keep the sample and promised the customers I will write up a tutorial to take with me for my next demo in June!


All the rest of my samples from this loop, (over 30 in total!) including the Boofle & Michael Powell ranges can be viewed by clicking the link to my Docrafts designer gallery on the right sidebar, thank you to everyone who have left lovely comments already.
Back soon! Ni. x